Blog

  • The Jabari Warrior M’Baku Pt. 1 of 2

    The Jabari Warrior M’Baku Pt. 1 of 2

    2018 was definitely the Year of the Black Panther! Even in the months before the film’s release, buzz was already heavy with magazine articles, trailers, and other teasers. Before the Becoming episode, I’d already taken a commission for the Jabri leader M’Baku’s armor set.

    The Challenge

    My client hadn’t planned to wear the armor until the summer convention season, BUT to make that timeline I needed to start much sooner. Generally, I am not a fan of beginning projects based on promotional images or paparazzi photos from the set as often times colors are not true and costumes may go through revision during filming. The July 2017 Entertainment Weekly (EW) Comic Con issue is a prime example. There are subtle variances to some of the costumes that appeared in the spread, which are never seen on screen. Although it was a our first look at the M’Baku armor’s detail, it also had an interesting color scheme: a deep blue with orange highlights. It’s possible this is the result of editorial choices made in processing the image, but it’s also possible this variant of the costume does exist. The photos my friends sent back from SFDC and trailer clips depicted the armor’s organic pieces to be a more natural brown/black.  We decided to hold off on paint until after the film’s release. 

    “Everything in Jabari land is made out of this sacred wood that can essentially go toe-to-toe with a Vibranium sword or a Vibranium weapon because it’s this tempered, strong, treated wood.” — Winston Duke discussing Jabari armor and weaponry with EW

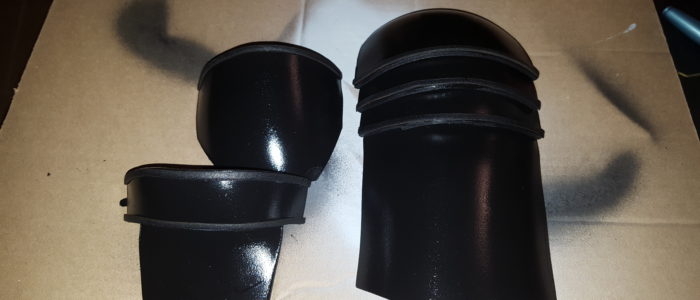
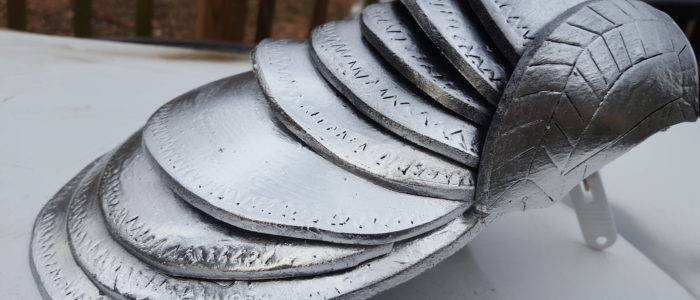
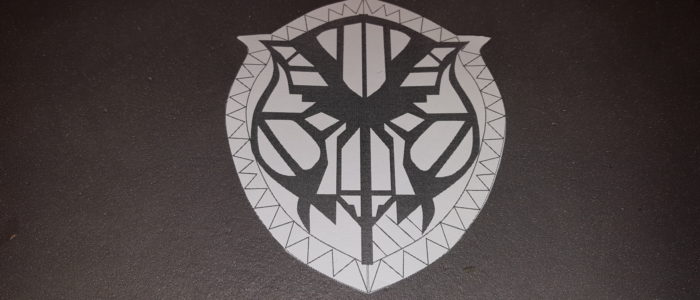
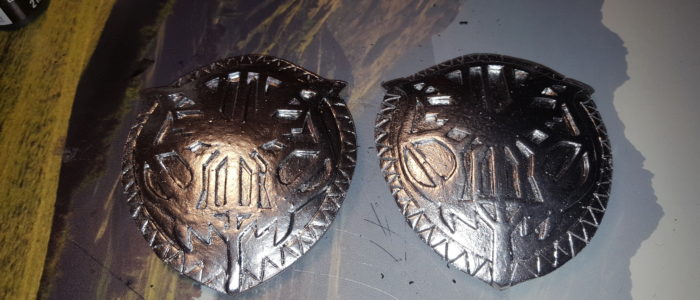
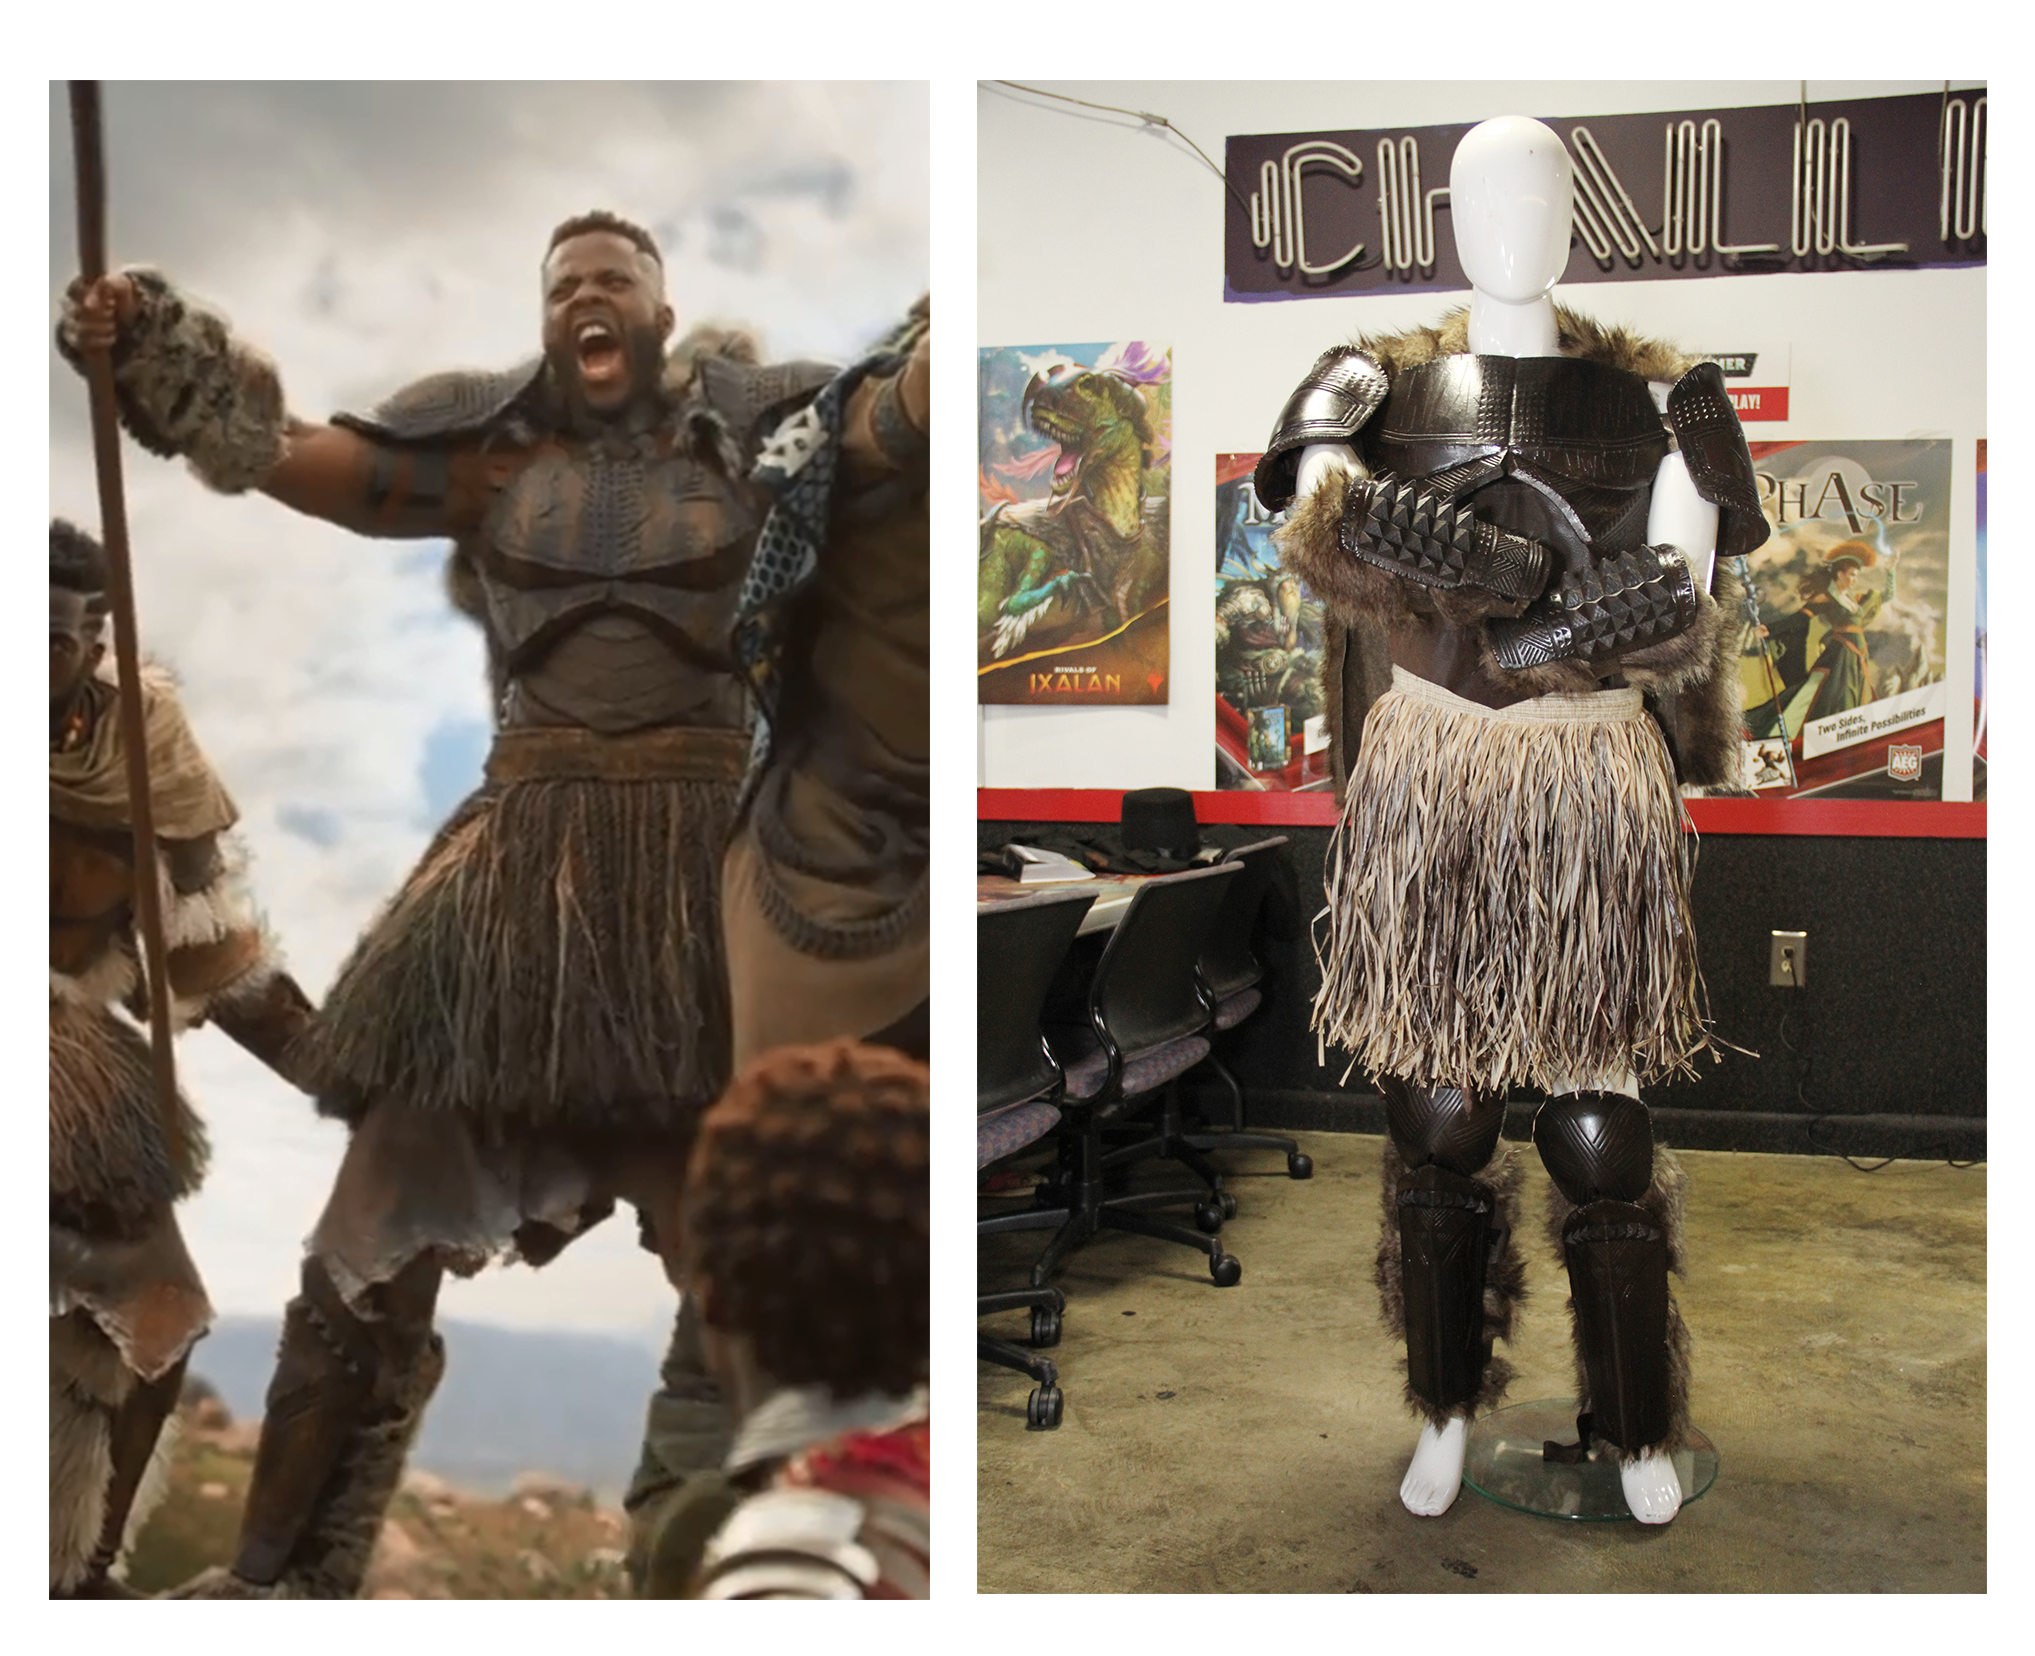
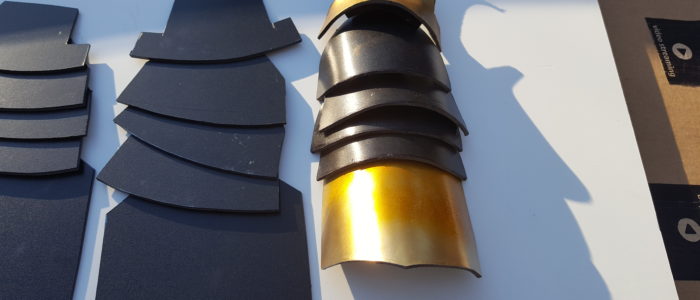
    The Jabari have chosen to shun Wakanda’s dependence on vibranium and technology. As such, their amor is organic and hand-crafted from hardwood with fur and leather embellishments. The one element every photo agreed on was the intricate engraving and overall dimensional nature of the pieces. Each element was decidedly unique with the kind of imperfections one would expect from carved and handcrafted wood. The armor carries a certain weight/heaviness; even without its sacred origins, it’s very apparent it’s both durable and functional. The overall design is also very masculine with its exaggerated pectoral plates and over-sized epaulets.

    The Build

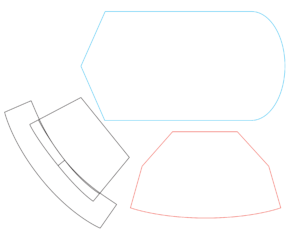
    I started with creating Illustrator patterns based on the available promotional images and a lot of fan shots. Although the magazine had clear views of the chest, I relied heavily on friend’s photos from the costume exhibit at SDCC and fan pictures from the exhibit’s stop at D23 Expo. Most pieces would require layering to achieve the necessary dimensional quality. 

    I spent a fair amount of time considering and testing various materials. From actually enlisting my dad to carve real would to sculpting clay models that I could resin cast later. My client had indicated he traveled to several out of state cons via air, so something lighter would be preferable. in the end, EVA foam won out.

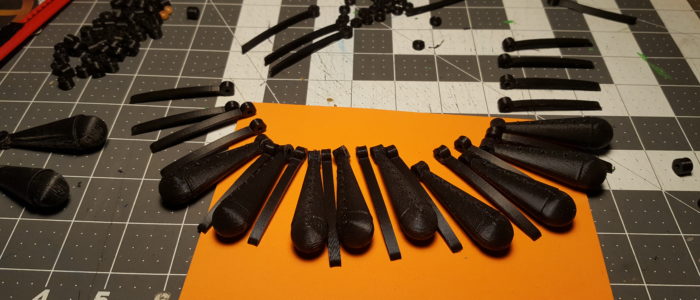
    The pylons on the gauntlets and shin guards were modeled and printed in PLA. I decided to leave them as grouped “sheets” to facilitate bending/curving the set to better fit the contour of the gauntlet. These elements were later added using contact cement with DAP caulk to seal any gaps.

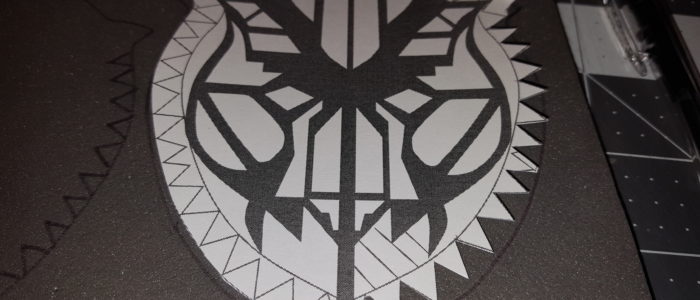
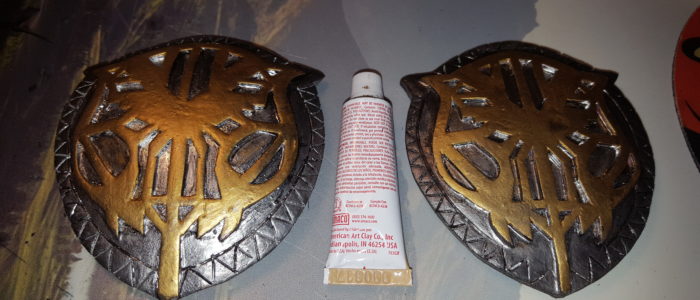
    The hard part: Beyond the organic nature of the wood pieces, I also had to contend with rendering an ‘engraved’ look to foam. I went through several rounds of test failures:

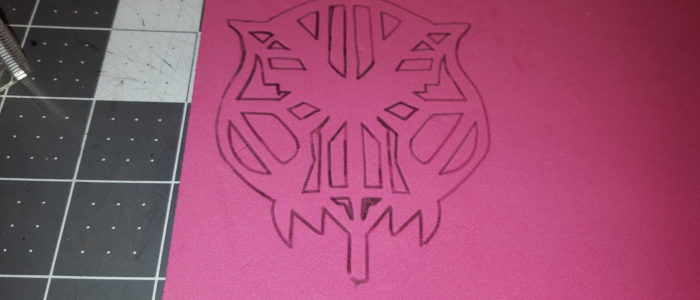
    1. Scoring with an Xacto followed by using a heatgun to define cuts. I used transfer paper to mark the foam, but the resulting patterns were neither deep enough, nor did they have the chiseled marks from mechanical tooling.
    2. Hot knife with various tips. Even while using a unit with a thermostat, engraving EVA is still a difficult task as melting is almost impossible to avoid. EVA also releases toxic gases when burned. I ALWAYS wear a respirator (not a dust mask) for this kind of activity.
    3. Rotary tool/Dremel. Yes, I was a starting to get disappointed, but I soldier on. I have a wide assortment of Dremel tips. The stone grinders and narrow metal engraving tips, most closely got me to my desired result, HOWEVER, a smaller rotary tool couldn’t stand up to denser foam tiling and the regular-sized tool was difficult to maneuver. Even with the flex shaft and control pedal, controlling speed and depth was a challenge. The longer lines were okay, but the legions of nearly symmetrical triangles, just wasn’t working out.
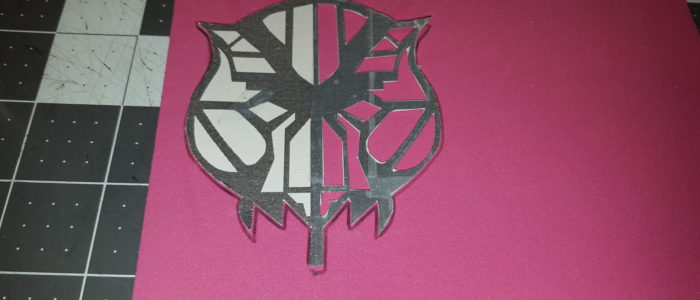
    4. Laser cutting: a more expensive, but accurate solution. Just as I was about to go back to trying a sculpt, I got an email reminder from Decatur Makers that they were offering a class on using their Glowforge. Months before I had seen an announcement when it arrived, but at the time I wasn’t clear on its capabilities. The “3D laser printer” tagline was very confusing. I popped in for the class and was hooked! Later that week, I took in a few prototypes of the base shapes for the pectoral and one shin to tryout how it would fair engraving EVA. With a bit of tweaking to the machines settings and my own files and I was getting exactly what I wanted!

    Since you aren’t supposed to make for-profit items at the space, plus it was ALWAYS booked (seriously, I went by once at 3AM on a Tuesday and there were people waiting), I decided to pull the trigger and get my own unit. (You can read more about my Glowforge adventure here.) Oddly, I managed to place my order during some kind of magical window. They’d just sent out their last Kickstart fulfilments and I was able to have a unit shipped and in my shop in less than a week!

    Even with the laser taking care of most of the heavy lift, I still needed to use the Xacto, hot knife and heat gun to add additional detailing and shape. Layers were glued using contact cement with caulk a seam filler and smoothing agent. 

    The Ooops

    The Glowforge can use a number of different formats, but I prefer to use SVGs exported directly from my Illustrator patterns. There are very specifics steps for doing this however, which I apparently missed. The SVGs used to cut my first set of shins and gauntlets were about 25% smaller than their original sizes. I also wasn’t happy with the detail and overall look of the 4mm EVA. I replaced most of these parts with the right-sized files on thicker EVA tiles from Amazon. 

    [masterslider id=”1″] 
  • Ancient Posts and Stranger Things

    Ancient Posts and Stranger Things

    If you subscribe to my site, you’re probably wondering why you’re getting notifications for ancient posts from last summer. The summer of Awful Web Happenings ™.  July was a bit not good. There were several issues with the blog: first a PHP mishap of epic proportions and later two malfunctioning plugins. At the time, I was in the midst of a busy con season and after several attempts at restoring the site using backups, I decided to relaunch the site all together. Unfortunately, I lost almost all of my content during the upgrade/changeover and let it go dormant out of frustration.

    But 2019 is a new year and I’ve heard you loud and clear in person, on Twitter, and on Facebook. I am hereby committing myself (yes, bring me a straight jacket) to making a greater effort to provide more engagement via this site and my other social.

    While trying to figure out where to go with the site, I found a semi-functional backup which included some drafts from the 2.0 version of the blog. Many of you had asked me about the Dora Milaje build, but between NDAs, another NDA project and the start of the con season, I didn’t get around to a write-up for a while. Then they were seemingly lost to the void during the first round of broken site issues. I’ve restored most of the original multi-part post (there was another page on strapping and beading that wafted away into the ether) and will finish up another project post about the M’Baku armor that debuted at DragonCon later today.

    Going forward, my goal is at least one post a week to catch you up on projects you might have missed and what’s currently under development for this season.  I am not that great at it (yet), but I promise a more focused effort in 2019!


  • The future is here and maybe I’m a Tony Stark, too.

    The future is here and maybe I’m a Tony Stark, too.

    I’m a huge fan of learning while creating and making. When I first began seriously crafting armor, I was more than a bit put off by the number of Tony Stark-esque basements and garages that seemed to be the official club houses of so many professional builders. They were chock full of hand tools, electronics and pricey gadgets. The longer I’ve been at it, I’m starting to realize that while some of it might have been vanity, a fair amount of it is probably driven by most creatives innate drive to do better.

    My first forays into 3D printing were strictly because I didn’t like the way small, greeblies and whatnots looked when I crafted them from foam or piled on a bunch of hardware store cast offs. I wanted small interesting parts, that looked functional and fully integrated with my costumes. Later, I bought countless knives, foam wands and sharpeners in the conquest for the perfect line, bevel and cut. Circles made me angry and hours spent smoking the shop while carving or engraving with a hot knife were satisfying, but I was often STILL not happy with the results.

    A few months ago, I started hanging out at my local makerspace again. Decatur Makers was my shop away from shop, during a weird period when for a host of reasons, my first studio was uninhabitable. Even after finding a new place, I still drop in or volunteer for a project because I truly enjoy meeting other makers and having an opportunity to learn and grow my skillset. Months ago I received an email that the space had finally taken delivery of a Glow Forge “3D laser printer” bought several years earlier as part of a Go Fund Me. As with most fund-to-build projects, delivery had been delayed for a couple of years. I did’t really think much of it, having relegated it to the land of CNC machines and vinyl cutters due to the confusing descriptor provided by the developer. I was interested, but not that excited..until I used it!

    The second night I dropped in to test it out, I ran into another costumer who was using it to cut Daenerys Targaryen’s filigreed breastplate from 2mm craft foam. The Glow Forge cut a beautiful design for all three pieces in less than 30 minutes. A feat which would have taken hours with an xacto and likely not produced such even, smooth cuts. I wanted to try it out on an upcoming project which had a lot of engraving/carving and was amazed at both the machine results and the revision to my workflow.

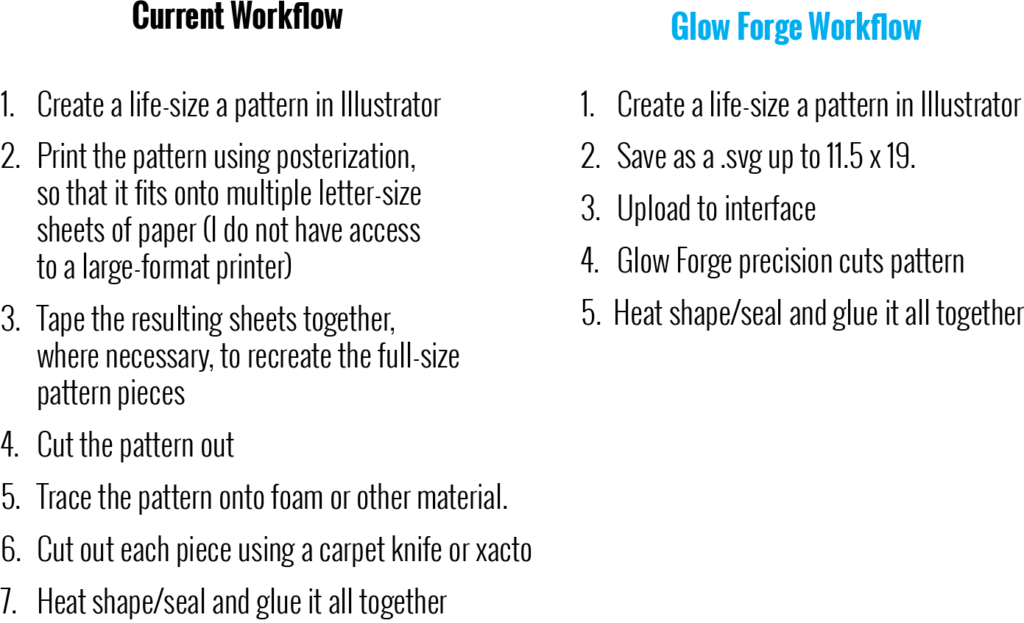
    Although it only removed 2 – 3 steps from my process, the time saved plus increased quality were amazing. Printing, tracing and cutting were the most time-consumptive parts of every project. I could prototype and revise much faster than my previous method. The only problem? One machine and dozens of excited users. I tried using the machine at 3AM on a Tuesday and there were people actually waiting about 30 minutes into my job. It’s the most popular piece of equipment at the space! There’s also language around using the space’s equipment for profit. I realized I’d want to use it on commissions and that those jobs typically would take longer than the new reservation system would allow.

    I took some serious mathematics and a whole lot of reassurances before I convinced myself it was to add a Glow Forge to my shop. So far, I’ve been very happy with the machines capabilities and looking forward to really testing it out on a Dragon Con commission: Black Panther’s M’Baku!


  • Thrill Builds on Twitch.tv

    Thrill Builds on Twitch.tv

    I get a lot of ‘how’d you do that’ questions and thought I’d start sharing my build process and progress on a regular basis. Everything I know, I learned from online resources and asking other people endless questions. It’s time that I gave back!

    You can now join me on Twitch for weekly, live build sessions. Tuesday nights will be devoted to pattern-making, my efforts to learn 3D modeling and whatever is coming off the build plate this week! Unscheduled bonus streams will happen, so follow the channel and turn on notifications! I’m still swamped and do take on NDA work, so I can’t swear that every stream will happen, be on time, etc. Follow me and get updates before I go live!

  • Recreating the Dora Milaje Part 2

    Recreating the Dora Milaje Part 2

    The Pauldrons

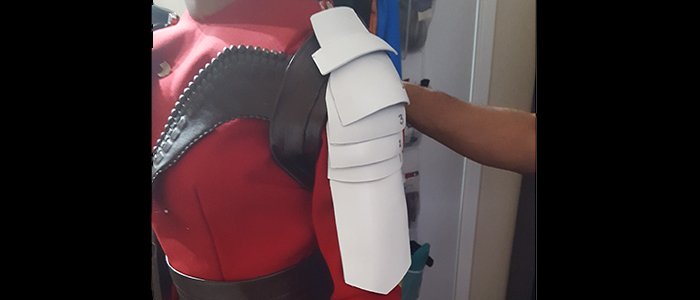
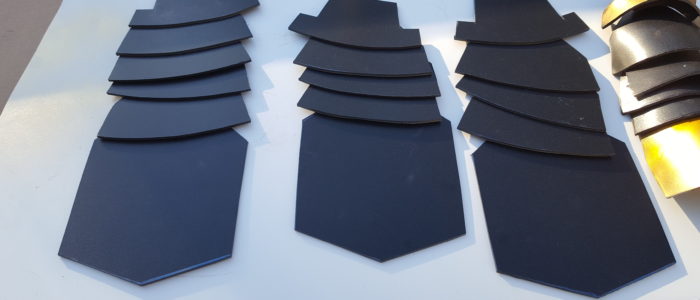
    Based on photographs, the shoulder armor appeared to be functional multi-part pauldrons. (Months later, I learned they were molded from a flexible rubber-like material.). The Nakia costume also had a variant shoulder piece, so I’d have to create two designs. I started by tracing patterns in Illustrator over references images, which were then printed and applied to sintra. The sintra was then cut, heat formed, and glued using superglue. I made a quick mockup for a try-on using some scrap material I had at the shop (old retail signs printed on sintra), before ordering slightly heavier material for the actual construction. Once I had my sizing adjusted for the thicker material, I also ran a few paint tests.
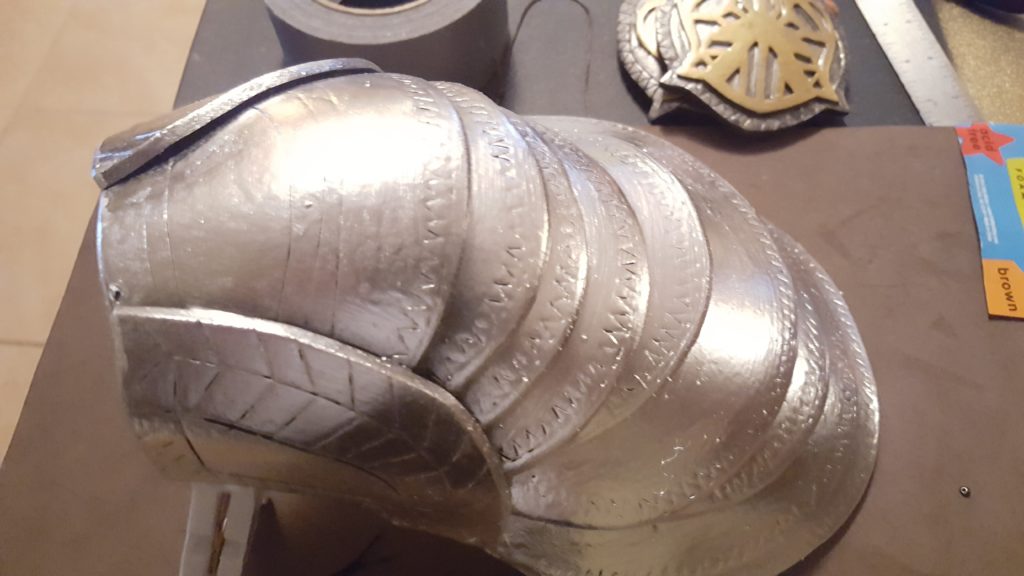
    Note: It was also around this point that time really began slipping away, so photos of ‘in progress’ items became a secondary concern. Sorry, folks!

    The Nakia shell-like shoulder piece required curvatures that would be more difficult to achieve in sintra, so I chose to use craft foam. I heat-shaped each piece and added detail by scoring with an Xacto and applying heat to seal the foam and open the scored areas. Individual pieces were  glued together to create the final full piece. Since it was well below 30 outside, I chose to use Creature Cast to seal as I could use it inside without having to worry about fumes or the temperature.

    Getting a bright metallic finish, without pricey chroming, can be a bit daunting. Since we were on both a short timetable and limited budget, I tested several paint options before settling on Spaz Stix Mirror Chrome and Candy Gold. Originally formulated for model finishing, the aerosol cans are smaller and more expensive than typical rattle-can paints, but well worth the investment. Although obviously not the same as chroming, the results from the two-step Mirror Chrome were particularly impressive on both the sintra and foam items coated in the Creature Cast. The gold variety was fairly bright, but not really what I had hoped for. I’ve since done a fair amount of reading on mixing or topcoating the chrome/silver, which may garner a better result on future projects.

    The Belt Buckle

    Walter was working on the leather harnesses and tabards, but we agreed I’d assist with the extensive beadwork. We discussed how to fasten the belt element, which I crafted with EVA foam. I traced photos in Illustrator to create printable patterns which were transferred to the foam. I used 6mm EVA for the base and 3mm craft foam for the panther detail. After coating everything with Creature Cast, I painted the base using the same chrome Spaz Stix I used on the pauldrons with a top coat of gold leaf Rub and Buff for the panther emblem.
  • Recreating the Dora Milaje Part 1

    Recreating the Dora Milaje Part 1

    Walter Invites Me on an Adventure

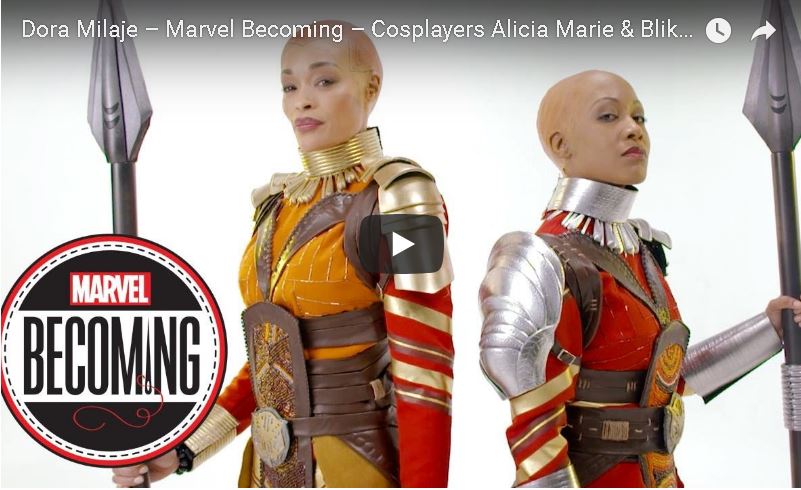
    When my friend Walter Dean, of Dean’s Lyst, first approached me to recreate the armor for the Dora Milaje episode of Marvel’s “Becoming” web series, I knew right away I wanted to take part. Like everyone else, I had watched each new trailer with growing anticipation for the film’s release. Friends had been sending me photos of Ruth Carter’s amazing work for months as the costume’s made the rounds of the summer convention circuit. The costuming was going to be an amazing part of the film’s look. I was also very excited to work with Walter. He’d subbed out work to me before, but this would be our first real collaboration. We have similar personalities, so I knew we’d be able to support each other and turn out something great without some of the extra stresses that come with a team effort.

    Challenges

    Time

    The arch nemesis of every creative. Unlike some episodes, we hadn’t already constructed Okoye and Nakia’s costumes. It was mid-December when I was brought in and Marvel wanted the episode completed before the film’s release in February. We now had a little less than a month before they’d arrive in Atlanta to shoot the episode. Due to NDAs, we also weren’t going to be able to bring in additional non-cleared help.

    References

    Marvel provided access to images from the production, but most appeared to be continuity or reference images taken for other purposes. We did, however, have images of the ever-elusive BACKS of the costumes and closeup details. We used a combination of those photos, web searches and images our friends at Dr. Law’s Photolab had taken during the costume’s stop at San Diego Comic Con. Leigh knew I’d likely get a lot of commission requests (his being one) and had taken 100s of images at the show.

    Model Availability

    Blikku was local, but Alicia Marie wouldn’t be physically present until the day of the shoot. (To compensate we acquired extensive measurements of both ladies with Blikku serving as a fit-model when possible. Some items were shipped coast-to-coast for try-ons.)

    Materials

    Almost everything in the film was hand-crafted (1/19 Update: Ruther Carter got a well-deserved Oscar nomination for her work!) and unique in both texture and appearance. We weren’t going to be able to find a lot of everyday equivalents.

    The Build

    The Neck Pieces and Gauntlets

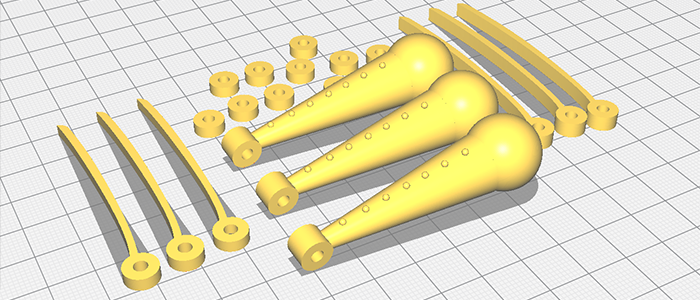
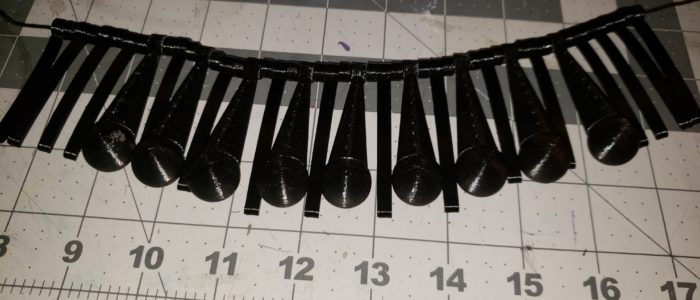
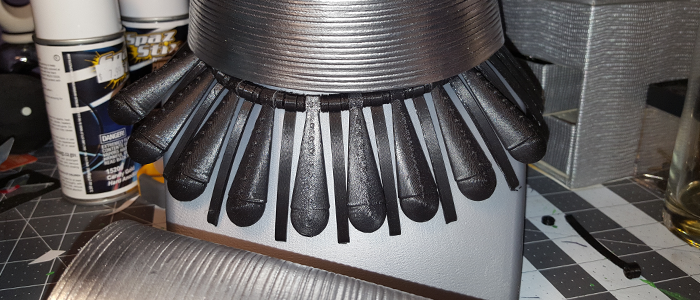
    Perhaps the most iconic part of the Dora’s regalia are the large statement neckpieces. The neck pieces were handmade by Los Angeles-based jewelry designer Douriean Fletcher. From the images, I could tell that each necklace was crafted in two parts: the larger neck bangles and the more decorative spade and cones beneath. The other challenge was the sheer number of components. Each necklace was made from dozens of individual components.

    My mom is a jewelry designer, so my first thought was that I would be able to recreate the pieces  by modding mass-produced items from a big box craft store or finding components at smaller custom shops that deal in high-end jewelry findings and materials.

    Yeah, that didn’t work.

    After countless hours trolling online dealers and two days of driving around to Atlanta shops, it became obvious that I would also have to hand craft the necklaces from raw materials. Only…I’m not a jewelry designer.

    I spent a few days fiddling around with random beads and other jewelry crafting materials with varying results. None of which looked close to the pieces from the film nor readily allowed me to reproduce the parts fast enough to create the two full neck pieces plus the rest of the armor.

    For me, that left either creating a mold or 3D printing the parts. Molds would be a more intensive process, so I went with a model and print. Those could run in the background, while I worked on something else. I am not yet an adept modeler, but I managed to cobble together viable parts using a combination of Illustrator, Tinkercad and 123D Design, the latter of which I discovered was no longer supported by Autodesk. I’d taken a few Fusion 360 course, but decided that time spent fiddling in an unfamiliar interface was time I didn’t have. I created the base shape in Illustrator, then extruded and combined in the other programs to achieve my final designs. I then printed the parts using PLA.

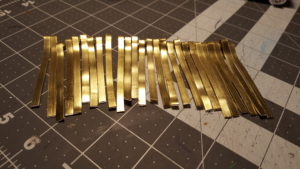
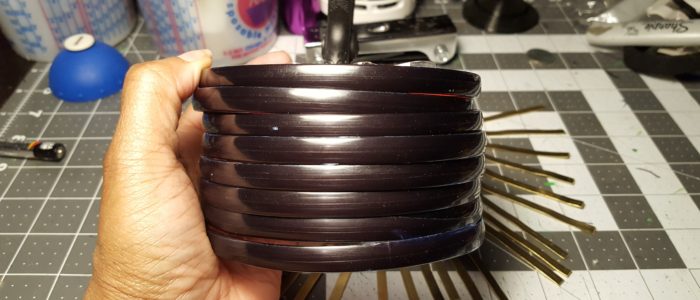
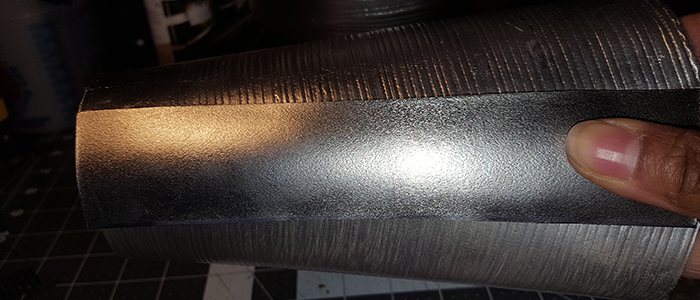
    I tried several store-bought options to replicate the bangle-like upper portion of the necklace. Most commercially available options were either too thin or well outside our budget. I found several online options which said they were created with “plastic tape”. After much Googling, I found chromed automotive molding was available at my local auto parts store. I used a ¼” strip cut, drilled and sewn with fishing line to a vinyl base to keep the strips together and allow easier fastening with velcro. The same process was used to create the Okoye gauntlets.

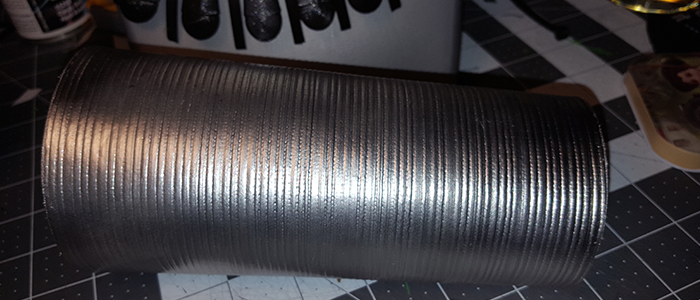
    Nakia’s armor is based on the base Dora uniform, which included thinner, more plentiful bangles for both the neckpiece and gauntlets. The ones used in the film appeared to be a hinged 3D print, which in some images looked to either have been created as two parts or separated from use. I found a ribbed rubberized vinyl to save time. Both the neckpiece and gauntlets were cut and glued to thin eva foam with sewn velcro to enable closure.

  • Featured Project: Marvel Becoming — Dora Milaje!

    Featured Project: Marvel Becoming — Dora Milaje!

    That time and let me play quartermaster and recreate ‘s fantastic armor designs. and brought it all to life with beauty, power and confidence! I had a wonderful time. Thank you!

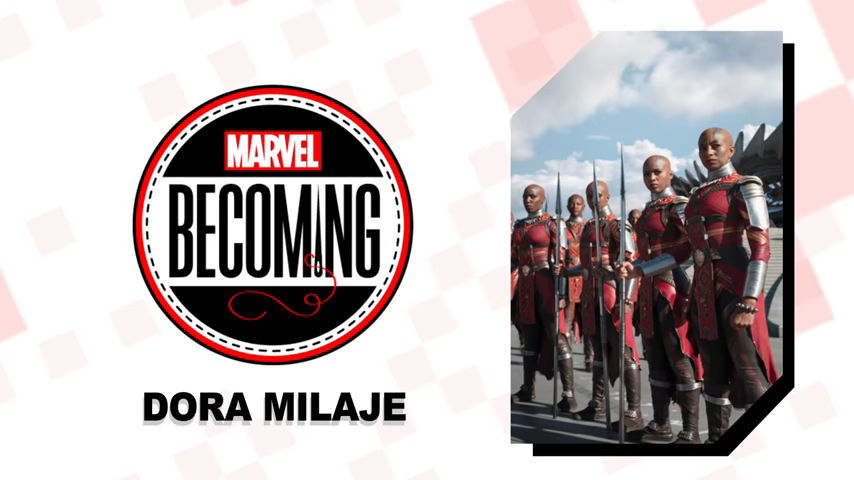
    If you’ve been following me on social or Twitch, you probably noticed that I disappeared in January. That’s because the fine folks at Marvel tapped Dean’s Lyst and I to recreate the Dora Milaje for the Becoming series. Due to NDAs, I wasn’t able to discuss the project and with such a short timeline, we pretty much worked around the clock to have the costumes ready ahead of what was an amazing video shoot! 

    Check back soon for a build diary!